1.Use the PictureBox Control to add a picture.
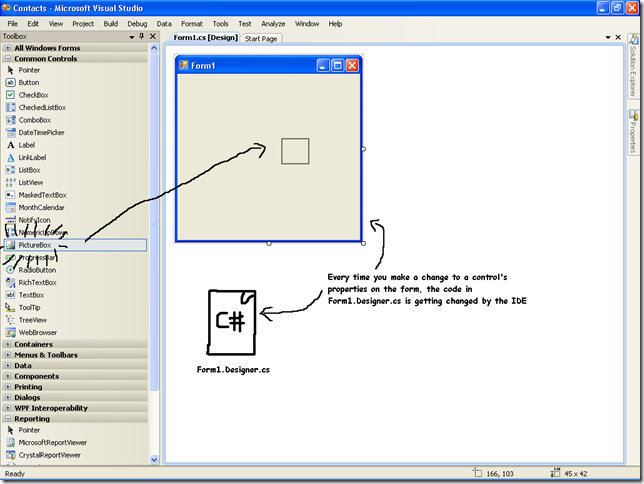
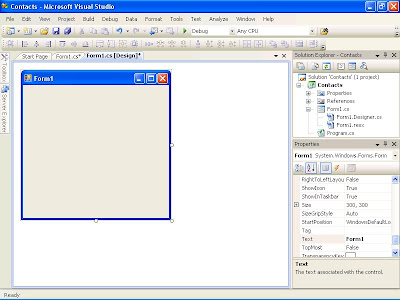
Click on the PictureBox control in the ToolBox, and drag it onto your form. In the background, the IDE has added code to Form1.Designer.cs for a new picture control.
2. Set the PictureBox to Zoom mode
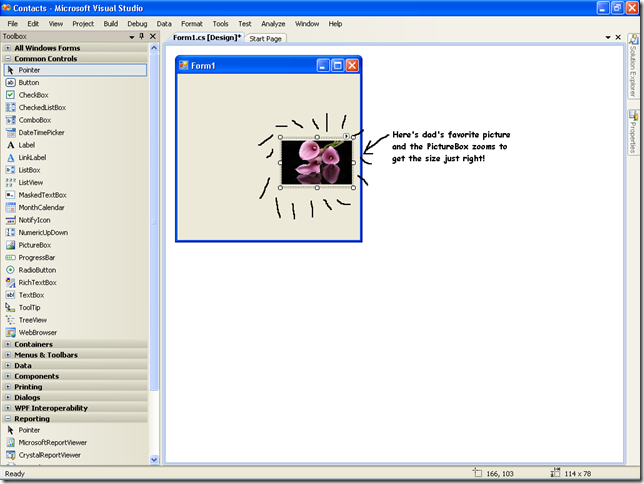
Every control on your form has properties that you can set. Click the little black arrow for a control to access these properties. Change the PictureBox's Size property to "Zoom" to see how this works!
3. Now Insert the Picture:
Now to insert your Dad's favourite Picture, click on the PictureBox properties arrow and select Choose Image. Click Import, find your picture on the hard drive and you're all set!!!
Visual Studio, Behind the Scenes!
Every time you do something in the VS IDE, the IDE is writing code for you! When you inserted the picture and told the Visual Studio to use the image from your hard disk, VS created a resource and associated it with your application. a resource is any graphics file, audio file, icon or other kind of data file that gets bundled with your application. The graphic file gets integrated into the program, so that when its installed on another computer, the graphic is bundled with your application. The graphic file gets integrated into the program, so that when its installed on another computer, the graphic is installed along with it and the PictureBox can use it.
When you dragged the PictureBox control onto your Form, the IDE automatically created a resource file called Form1.resx to store that resource and keep it the project. Double click on this file on the Solution Explorer tab and you'll be able to see the newly imported image!
Add to the Auto-Generated Code!
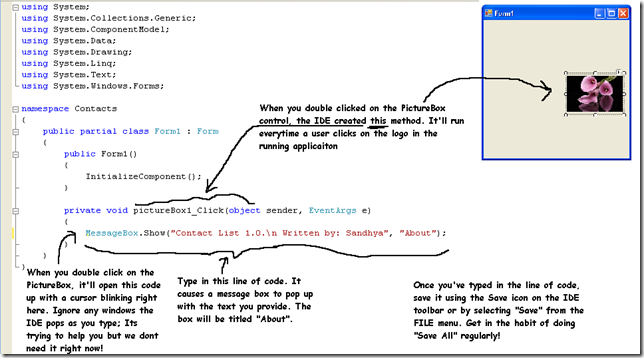
The IDE creates a lotta code for you, but you'l still want to get into the code and add to it! Let's set the picture and show an About message when the users double click on it.
Make sure you've got your form showing in the IDE and double click on the PictureBox Control. You should see some code pop up that looks like this:
You are ready to run your application!
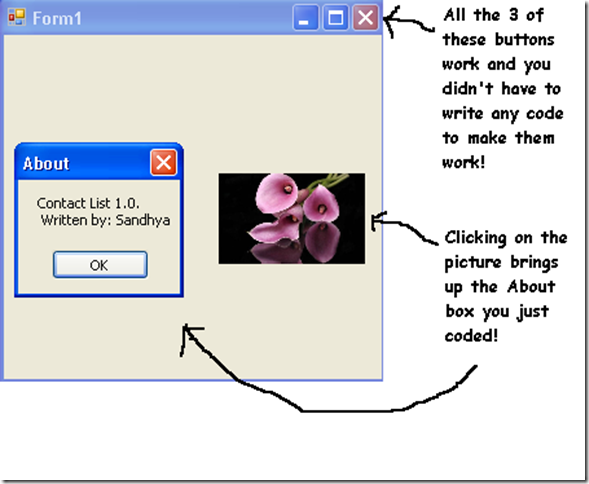
Press F5 to run your application or click the green arrow button on the toolbar to check out what you've done so far. This is called Debugging which just means running your program from the IDE. You can stop the debugging by pressing the Stop Debugging from the Debug menu or clicking the toolbar Stop button.
Yay!! We've built a form and created a PictureBox which pops out a message box when its clicked on! In the next post, we'll add all the other fields from the card like contact name and address and for that we need to create a database. So, we're going to jump from the .NET Visual objects straight to the Data Storage section!!
